

The cold and frost of winter present all kinds of challenges for winter photography. However, with those challenges come such unique opportunities to create compelling and stunning winter landscape images. Make sure you see my previous winter photography tips on the right clothing and gear to keep you warm and the best camera gear accessories for winter photography. Once you are all bundled up and ready to explore the winter wonderland, the following winter photography tips for shooting in cold weather will have you capturing the magic of wintertime.
Helpful Winter Photography Tips for Shooting in Cold Weather
1.) Shoot RAW
The RAW file format captures all image data recorded by the sensor. On the other hand, the JPEG format compresses the information so you are losing information and quality. There are plenty of situations where JEPG will suffice. However, for winter photography, you want the extended latitude of freedom for post-processing that a RAW file will deliver.
For example, JPEG records 256 levels of brightness. Whereas, RAW records between 4,096 to 16,384 levels. Think of all those numbers of steps from black to white in a snow-filled image. The effect it has on the image is huge because that additional information allows you so much flexibility in post. You can adjust your exposure, contrast, highlights, shadows, whites, and blacks. Yes, I essentially just named the entire basic panel in Lightroom. This means it is easier to correct overexposure and underexposure issues that arise of the winter wonderland tricks your camera’s meter (see tip below to address that). In addition, you can easily adjust the white balance in RAW. This is another important component since snow is so reflective of the surrounding lighting.
2.) Expose to the Right of the Histogram
The second winter photography tip is to become friends with the histogram on your camera. Do not, I repeat, do not rely on your LCD or EVF to show you how the image will look when you put it up on your monitor. This is because you are almost always viewing a JPEG preview image on the back of your LCD screen. Moreover, the brightness of the screen can make you think the image is darker or lighter than it actually is in the RAW file. This is why you can only trust the histogram, the graphical repression of the tonal range of the image. It shows you exactly how much of the image is a shadow, a highlight, and everything in between the two.
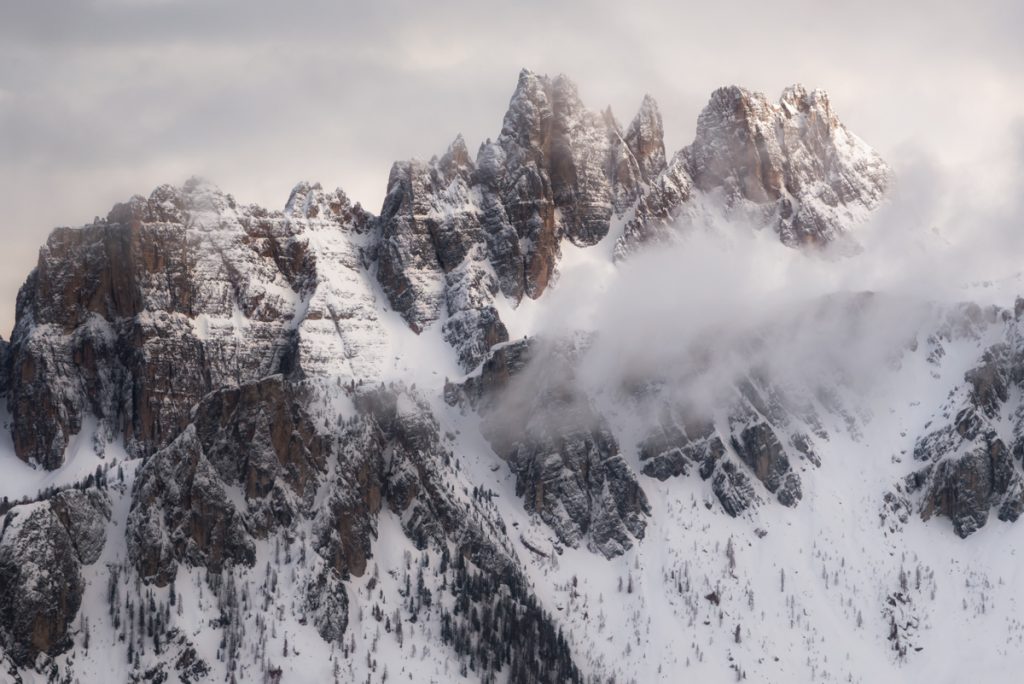
The reason this is critical with winter photography is that snow is incredibly reflective. If you are capturing snow blanketed across the landscape, the histogram should be mostly on the righthand side. On the right-hand side of the histogram are the bright pixels recorded. The height of that area shows brightness of that tone.
Sadly, your camera’s metering system is a robot that can’t think for itself. The camera’s metering system sees a mostly white scene and attempts to move everything to the middle go the histogram. This attempt inadvertently darkens the snow giving it a grey and muddy look. The meter can view the scene. However, it cannot interpret the scene as snow and know it should be mostly white, not grey. You want to adjust your settings to push the data towards the right of the histogram. Take care to push it but not so much that you clip the data. By adjusting your exposure, you help the meter correctly interpret the scene so the camera will capture the same bright white snow that your eye is seeing.
Again, you want the histogram towards the right for a snowcapped scene. “White is right” is an easy way to remember the direction of the histogram. Personally, I always want to ensure that I capture the details in the snow’s texture. So I will see if the scene would benefit from a circular polarizer and/or neutral density filter.
After choosing my setup, then I check my histogram continuously during the shoot to ensure the histogram makes sense for the scene. Similarly, depending on the scene, I want to ensure my shadows are not clipping. Shadow clipping is when the histogram is pushed too far to the left. I’ll use exposure compensation if I need to make small adjustments. If I truly cannot tame that histogram, then I bracket to ensure I have a proper exposure for both the highlights and shadows in the scene.
3.) Use the Light While You Have it
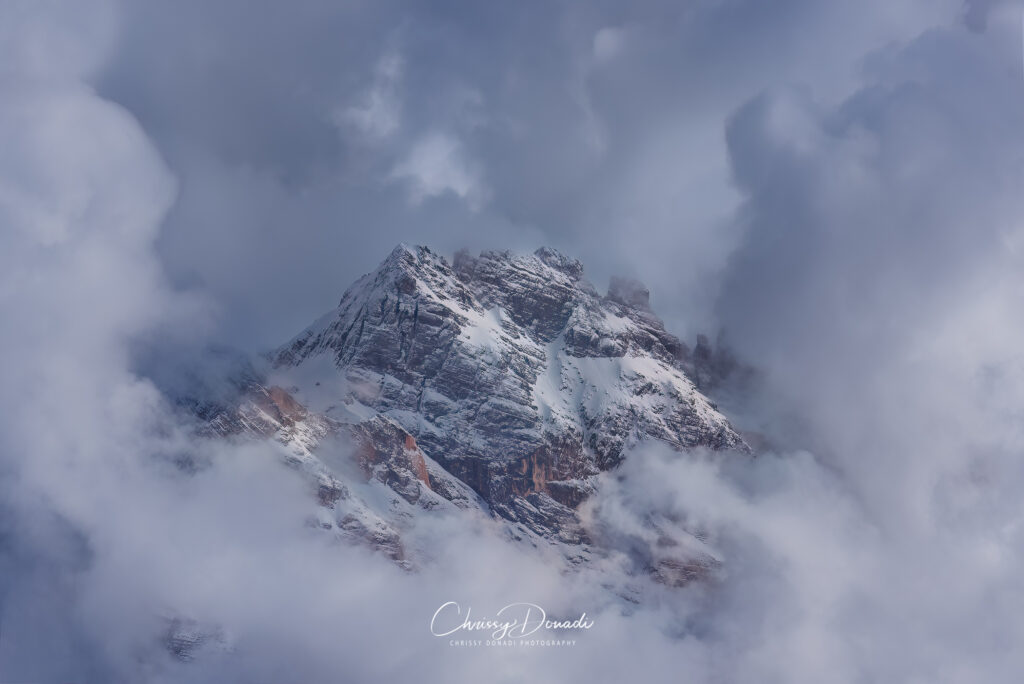
Winter is a fickle season in terms of dynamic light. First, finding colorful and crazy sunrises and sunsets isn’t as plentiful as in other seasons. This is compounded by the fact that you are operating with many more hours of darkness during that season. However, you really don’t need colorful light to make compelling winter landscape images. You need to compose for drama and intrigue in winter images.
There is no bad weather. If the sun is out and visible, use it! Naturally, try to be in a location for sunrises and sunsets. On overcast days, look for small scenes to shoot or find a winter waterscape with some ice and flowing water. On bright days, try to use the sun to backlight snow-covered trees or contrast the blue sky with the white all around the landscape. Find small scenes or frost to capture. Look for interesting patterns in the trees or on pinecones. No matter the type of day present, push yourself to find something interesting to shoot each day. Alright, unless you are in blizzard conditions, then you can remain in bed.
4.) Keep your Camera and Gear Warm
If you are not actively shooting, then put your camera gear back in your pack. This winter photography tip is to protect your gear from the elements. Keeping your camera stored during downtime will help to preserve the core temperature of the gear. Even if I am all set up but am waiting on the light to arrive, then the camera goes back into my bag. I’ll pull my camera out right before I’m ready to shoot. Then, I’ll quickly review my settings before starting to shoot. This is important to preserve your battery life, but also to prevent unnecessary issues. For example, snowflakes can melt and then refreeze in little cracks or around your filters. A filter frozen to your lens when you’re out trying to photograph is frustrating!
This goes for your tripod as well. Having your tripod exposed to the elements can wreak havoc, especially when it is fully extended. Having the ballhead or leg locks freeze will really put a damper on the outing. So I never lay my tripod down in the snow. In addition, I try to protect it as best I can. I’ll even put it in a case when I will be outside for long periods of time. Protect both your camera gear and tripod, and it repay you in the long run.
5.) Compose with the Snow and Look for Patterns & Textures
Winter landscapes can be slightly depressing, especially at lower elevations. You’ll often run into dead grass, mud, bare trees, and the land filled with dead leaves and twigs. The beauty of snow is that it really cleans up the foreground by simply sweeping it under the rug. Well, in this case, that rug is a blanket of snow.
More often than not, we think of snow as a fresh carpet of white covering in entire landscape – untouched and pristine. And perhaps that is true for the first moments after a fresh snowfall. However, Mother Nature loves to play with Jack Frost. She is revealing art on a canvas if you look for it. Moving water can create impressive visual focal points for a composition. Wind sweeps snow to reveal textures and patterns. If you start training yourself to consciously look for textures and patterns, then you will start to see patterns and shapes everywhere in winter. Recently, I’ve been in a phase where I really enjoy shooting wide-angle and low to the ground to fill the frame with my foreground. I love the texture in the snow and trying to capture the glistening sun reflecting in the foreground snow.
While it can be challenging at the beginning, try to really think about using the snow as a compositional tool for your winter landscape photography. Use snow to highlight space, size, and contrast among Mother Nature’s elements. Look for layered patterns, leading lines, or s-curve patterns in the snow through the landscape or even with boot tracks. In addition, use the snow to simply a scene that is otherwise too busy. Finding images to convey minimalism can become addictive. Winter is the perfect time to simply. It’s the time to find a single and unique element of a landscape and compose around that element. This is why people become fascinated with images of frost, a snowflake, or methane bubbles in a frozen lake.
6.) Slowing Bring Camera Gear to Room Temperature
Winter photography tip #4 discussed protecting your gear while you are outside. This winter photography tip is how to protect and care for your gear once you return to your home, hotel, or igloo. Some will tell you to place your camera and lens in a sealed bag while you are outdoors. The outside air becomes locked in the bag with your gear. This reduces the chances that warmer air can interact with your camera and create condensation on the camera’s internal components. So there is no fear that this will occur from the air inside your vehicle because let’s face it, you’re cranking that heat up all the way once you finally get back to the car. In addition, it protects your gear from the heat at the house or hotel.
On the other side of the playground, those kids will tell you that is overkill and completely unnecessary. These friends recommend that you simply leave your camera and lens in your camera bag zipped up for a couple of hours after a winter shoot. To be clear, you zip your camera bag up while you are outside, then place it inside your vehicle and then inside your house/hotel for a few hours before opening the bag again. This has been my method for years and thankfully, knock on wood, I have yet to encounter an issue. I am simply mindful to always keep my camera and gear away from radiators or any type of head source to avoid creating condensation within them. Normally, I’ll bring my camera pack inside and leave it in the entry hallway or near the doorway, where the house naturally remains slightly cooler anyway.
I hope these 6 winter photography tips serve you well as you wander through winter’s wonderland. What other winter photography tips do you have? Share them in the comments below. Happy Photographing!
+ show Comments
- Hide Comments
add a comment