One of the controversial mantras of landscape photography is you need dramatic light to make an impactful image. A consecutive forecast of clear blue skies has the power to bring many landscape photographers to their knees. Alright, maybe that is a little dramatic. Clear blue skies in landscape photography certainly has the power to dampen the mood or encourage even the most devoted outdoor photographer to sleep in and skip that morning’s sunrise.

There is a portion of me that can understands this reasoning, especially for those who live that nomadic, camper van lifestyle. Although, many of us don’t have that luxury. We adventure to new lands during our vacation time or explore locally as weekend warriors. For those situations, we have to work with the weather before us. This is where a little knowledge, experience, and curiosity can make or break the experience.
On a recent winter trip to Yosemite National Park, Mother Nature gifted us 4 straight days of blue skies with a snowless landscape. Seriously, I think I counted 2 clouds and some smoky haze from a nearby prescribed burn during the entire stay. Without even consciously thinking about it, we continuously photographed and left our trip exhausted and satisfied.
If this happened years ago, I would have felt stuck and bummed about the weather conditions. What do you do without playful clouds or epic light? Actually, clear skies are not always bad. There are situations where a clear sky is exactly what you need for the photograph. Here’s my advice on finding the magic from clear blue skies in landscape photography.
First, What Value Does Blue Hold?

The color blue is an emotional landscape in itself. We talk about feeling blue when we are sad. On the other hand, when references the landscapes, the general population “we” talk about blue skies as being happy days and good weather. So, the color blue is a complete contradiction. The silver lining is we can use each aspect of that contradiction in our photographs.
Second, blue is the popular kid. It’s one of the most universally appealing colors. Typically, blue is thought of as calming, relaxing, and delivering a feeling of peace. It makes us feel confident and secure. It is associated with honesty, commitment, serenity, and peace on the positive side of the house. It’s predictable, dependable, and responsible. That’s why things that come “out of the blue” means to appear unexpectedly. On the other hand, blue is associated with being cold, sadness, fragility, and depression. Blue offers us so much variety.
Complementary Color and Harmonious Colors
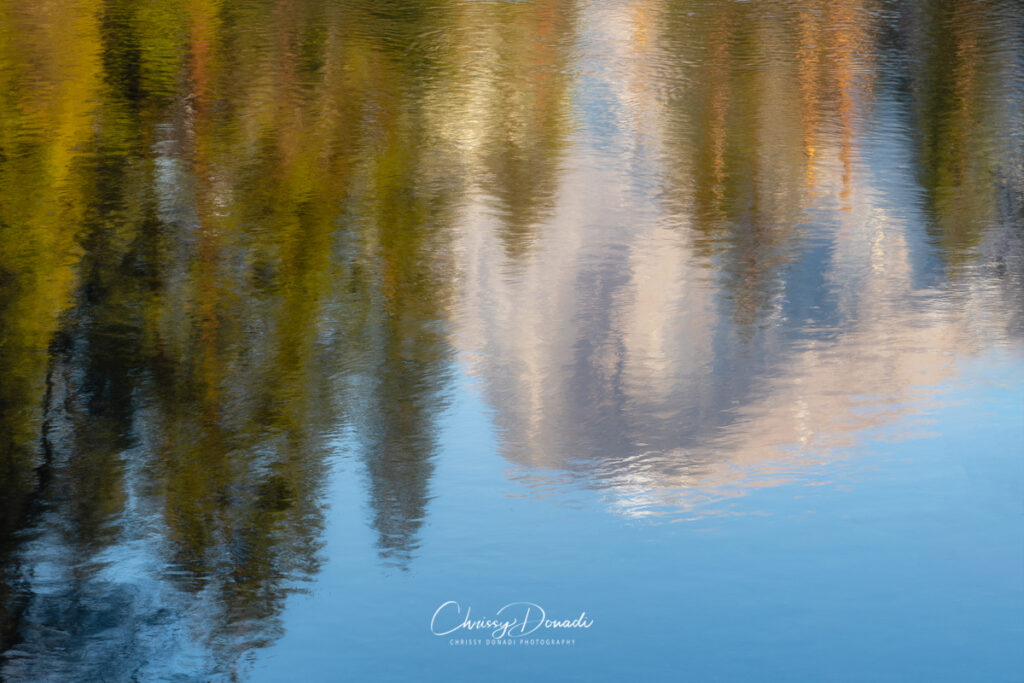
Complementary colors are any two colors opposite each other on the color wheel. For example, complementary colors of blue will range across the yellow, orange, and red spectrum depending on the shade of blue. As I’m exploring, I’ll be on the lookout for yellow flowers, golden reflections on blue water, yellow or orange autumn trees, or even red rock. When you use complementary colors together, they create an incredible contrast which will help the image pop. This helps the sky to naturally become a supporting actor in the scene.
Harmonious or analogous colors sit beside each other on the color wheel. These colors work well together and create an image that is also pleasing to the eye. Green and purple/violet are the harmonious colors of blue.
This isn’t to say that you need a composition that matches one of these color combinations. I only mention these pairings as things to spark your creativity as you explore.
What Scenes Work Best for Clear Blue Skies in Landscape Photography?
Reflections
If you have water in your location, that is a great place to start. Keep your eyes peeled for puddles or little pools of water that can often lead to wonderful surprises. Often, the water reflecting that blue from the sky appeals to the viewer’s eye. Both the stillness of a reflection and the color blue itself deliver to our subconscious the feeling of relaxation, peace, and tranquility.

Stars, Moon, and Night Photography
Typically, clear blue skies is the perfect time to photograph the night sky in landscape photography. Here, depending on the location and the time of year, you have the opportunity to photograph stars, the moon, or even the milky way. The goal is to be near dark skies and avoid light polluted areas like near big cities or towns. Scout your locations during the day and perhaps even plan to arrive early or stay late during blue hours to ensure you capture a proper exposure of the landscape to combine with a proper exposure for stars or the moon. An app like PhotoPills is a great aide to finding where the moon or milky way will be on any given night. There’s so much more to say about night photography so we’ll save that for another post dedicated to the subject.

Treasure Hunt to Photograph Rainbows
All you need is rain drops, sunlight, and refraction! Anywhere you have misting waterfalls and direct sunlight, you can find a rainbow. The trick is to arrive at the right time for that sunlight to refract off the rain drops in the air. Typically, this means you want the sun to be low in the sky. You want the sun to be at your back as you are facing the misting waterfall. The rainbow will move in relation to the sun’s position. In the morning, the rainbow will crawl from the top to the bottom of the waterfall as the sun rises. Conversely, as the sun sets, the rainbow will climb from the bottom to the top.
As a note, when photographing a rainbow, it’s helpful to use a circular polarizer. Rotate the polarizer just enough to enhance the colors, but not do not rotation to full polarization because that will remove the rainbow since you are canceling out the refraction.

Small Scenes
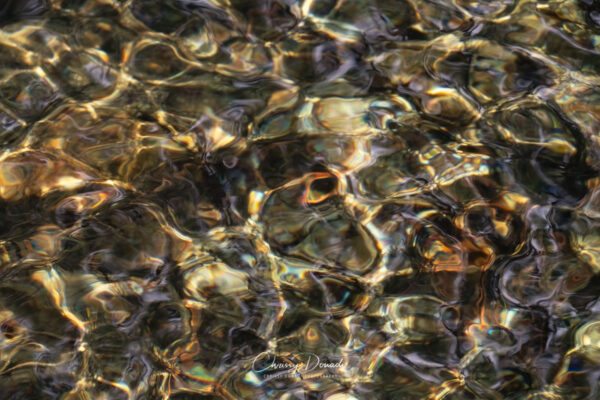
There is so much variety to be found in any location if you shift your attention to small scenes. There is the opportunity to play with dappled light sparkling in the water. Mineral pools, decaying leaves in a puddle, ice or salt crystals, mud cracks, or glacier lakes can deliver wondrous results in direct light. With small scenes, you can control the light with a diffuser, your backpack, or even your coat. I’ll often just hold up my coat to shade a scene and use a delayed timer or remote shutter release to take the image.


Canyons and Bounce Light
Okay, clearly not in Yosemite, but I can’t ignore this tip because blue skies and canyon lands are a perfect match. A clear day offers beams of sunlight and stunning glows from bounce light in canyon land if you time it right. For many canyons, the best time to photograph is either early morning or late afternoon. Direct noontime sunlight will the colors within the rock to look more washed out. If it is your first time photographing a canyon, you might want to try moving your white balance setting to cloudy (assuming you are shooting RAW). Changing the white balance makes it a little easier to see the deep oranges and reds. This helps reveal the potential of what a little post-processing might deliver.

Convert to Black & White
If you are having a difficult time or feeling a little lost on where to start, change your perspective. Removing the color from a scene makes your eyes focus elsewhere and see the landscape completely different. It shifts your focus to textures, patterns, and the varying contrast within a scene. Start to play with shadows, highlights, and areas of harsh light to create dramatic images.
A scene with extreme contrast can be very pleasing to the eye in black and white. Look no further than Ansel Adams for proof of that one. As a note, you can enable “monochrome” mode on your camera. This will have your images appear black and white on the camera’s LCD screen but when you open the file on your computer, you have the option to edit in color or black and white. All the same information is contained in that RAW file. Also, be sure to watch your histogram periodically. It is best to give yourself some room (not have the data pushed too far to the right or left) in the exposure so you have flexibilty to work with the image in post.

How to Adapt for a Sunny Forecast in Landscape Photography
For Scenes that Desires Even Lighting
For grander landscape scenes when you desire shade or even lighting, such as with moving water, timing your arrival right before or right after sunrise will give you the best chances. You’ll have a short window of soft light to capture a few images. This works great for waterfalls, scenes with moving water, and some forest scenes. Take the time during the afternoon to scout for the composition so you just have to show up, setup, and photograph during that small window of soft light. For example, if you waterfall faces east, the sun will start moving behind the falls in the afternoon providing shaded conditions. If the waterfall faces west, then you want to be there in the morning before the sun rises too high in the sky.

For Subtlety During Dawn and Dusk
It may not be the image you envision, however, sometimes you only get one shot at a location. If that’s the case, I encourage you to still go out and photograph. The days with clear skies give opportunities to practice photographing high dynamic range at sunrise and sunset. They give opportunities to stretch our post-processing skills and experiment in the digital dark room. And above all, they give moments to perhaps shift our focus from the back of the camera screen to connect with the nature before us. A time simply to be present and take it all in. I hope these ideas spark your creativity the next time you have the opportunity to go off into the blue and lose yourself in nature for the day (or night). Happy photographing!
What other scenes do you like to photograph with clear skies? Let me know in the comments below.
[…] perfect moment when the sky is on fire. Rather, it is patience for the entire experience, even with clear blue skies. Be open to using light as a tool to invoke emotion in the scene, where small shifts can make […]