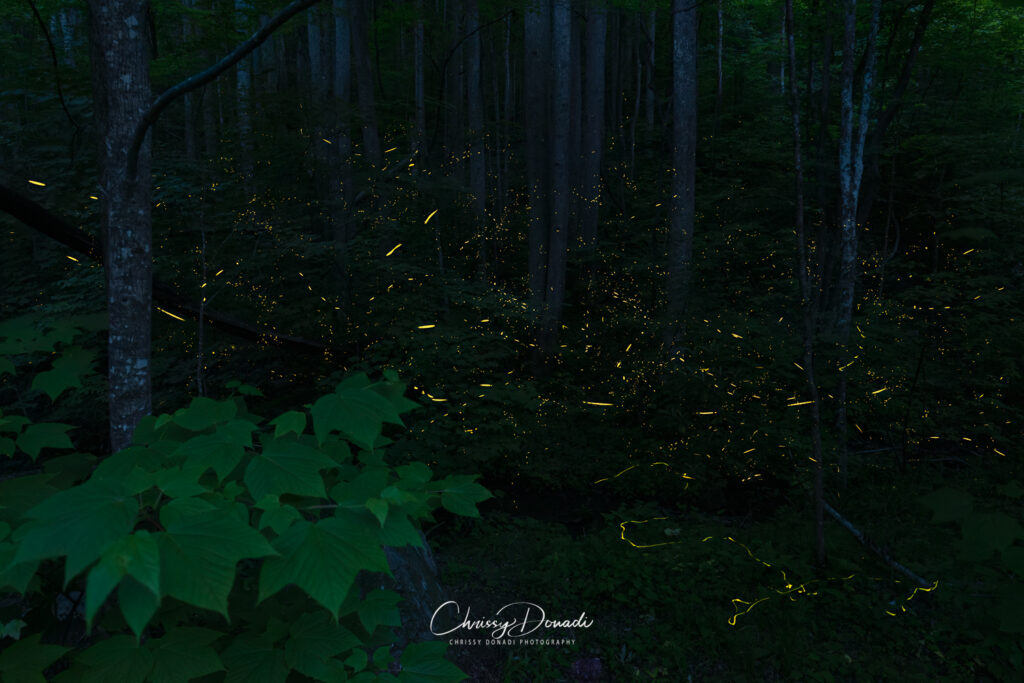
If you spent your childhood in the Eastern United States, chances are you have vivid memories of flashes of yellow illuminating your yard on a warm summer night. Watching lightning bugs, as I used to call them, is an activity that transcends age, filling us with wonder and awe. There is this rhythmic and calming silence watching the golden shimmer across the landscape.
I first started attempting to photograph fireflies and lightning bugs during the pandemic. As with most new projects, I immersed myself in researching, their habitats, the different species, mating rituals, their ecological importance. Although, the one thing I didn’t read about was how to photograph fireflies. Instead, I tinkered with trial and error each night for the precious couple of weeks they were on display. My knowledge accumulated as did my total mosquito bites for those two weeks. If you happen to be smarter than me and google “how to photograph fireflies” and find this page, allow me to share some valuable tips to capture the magic while reviving your spirit.

An Important Note About Lights
While a few firefly species come out at dusk, the majority light up at night. In the Great Smoky Mountains National Park, the show starts about 30 minutes after sunset and lasts around 2 hours. I was photographing between 9:30-11:30 PM – a time I like to reference as “easy to freak yourself out” dark o’clock. In order to keep your night vision intact, you will not want any amount of light from your camera.
Moreover, I cannot stress enough the significance of safeguarding their habitat. Fireflies are an indicator species. They provide important clues for researchers about the health of the environment. Additionally, the luciferase (glowing) gene from the firefly has many applications in medicine, science, and industry. Their flashing is an intricate ritual to find a mate. Any artificial light, be it porch lights, lawn lights, headlamps, or camera lights, disrupts and confuses them in this ritual and reduces the chances of finding a mate. It also means they are not inclined to dance in front of your camera. If we venture into a habitat to photograph fireflies, then we must adapt and protect their fragile ecosystem.
Prepare to Become Photography Ninja
Like ninjas, we must remain unseen and unobtrusive in the presence of fireflies. Before you go, take your camera into your bathroom or any dark room in your house and turn off the lights. Then, observe what lights up when you take a photo. Cover anything on your camera that could flash or emit light during your nocturnal expedition. Gaffer tape came to my rescue, I covered up the red-eye reduction/self-timer light in the front and the little rear red lamp that blinks when data was transferred from the camera to the memory card. While these lights might seem trivial during the day, they can be extremely frustrating in the pitch dark of night.
To further preserve the fireflies’ sanctuary and keep my night vision intact, I adjusted my settings so I would have to use my viewfinder to review my photos or see the current settings (not the LCD display). Even on the dimmest setting, you don’t want your camera’s LCD display disturbing the serene darkness; it’s like your mom suddenly turning on the bedroom light, warning you that you’re running late for school. Next, I created my own dark cloth using a towel to cover my head and the back of the camera. This was for backup in case something went wrong and I needed to use the LCD display.
If you need light for navigation or any other reason, opt for a red light (blue apparently is okay too), which will not disturb the fireflies. I used red cellophane over my cellphone and the red setting on my headlamp. However, I used these sparingly and mostly for finding my way back to camp after my photography session. Also, please stay on the trails and avoid walking through the forest vegetation, as many fireflies, especially females, hide in the grass or leaf litter.
All of this not only helps protect the fireflies but also creates better photographs. If you want these lightning bugs flying back and forth in front of your camera, then you need to essentially become one with the forest, allowing them to feel safe and fly freely around you. That means blending into the forest where you and your tripod pretend to be trees for the night. Not to mention, it’s pure magic to watch the lights swirl around you.

Camera Equipment to Photograph Fireflies
In terms of equipment, you’ll need a tripod. In general, you do want a wide-angle lens simply because it will be easier to photograph lots of fireflies in the frame. Additionally, you don’t need a fast lens. Yes, faster will be better, but it is not necessary with today’s cameras and denoise software capabilities. If your camera doesn’t have a built-in setting for capturing time lapses, then you’ll want a shutter release or intervalometer (a device that connects to the camera and regulates the number, timing, and duration of photos taken). Last, make sure those camera batteries are fully charged to work continuously for a few hours.
Even though it is summer, I wore long pants and boots to protect me from mosquito bites and as a layer of protection from things like poison ivy, which is harder to spot in the dark.
Here’s my quick packing list:
- Tripod
- Camera with lights covered
- Lenses
- Fully charged batteries
- Remote shutter or intervalometer
- Protective clothing/ mosquito repellent
- Camping chair
- Water and snacks
- Red headlamp and red cellphone to cover cell phone
How to Photograph Fireflies and Lightning Bugs
Take the Foundational Photo
As for the actual photography, you’ll be surprised by its simplicity. Begin by exploring your surroundings during the day to fine a compelling composition. With over 150 firefly species in North America and about 2,000 worldwide, understanding the habitat that’s specific to your region is essential. In my case, I sought an opening where the lower canopy of the forest was open, positioning myself along the forest edge. If needed, use the first night to scout where there is an abundance of fireflies.
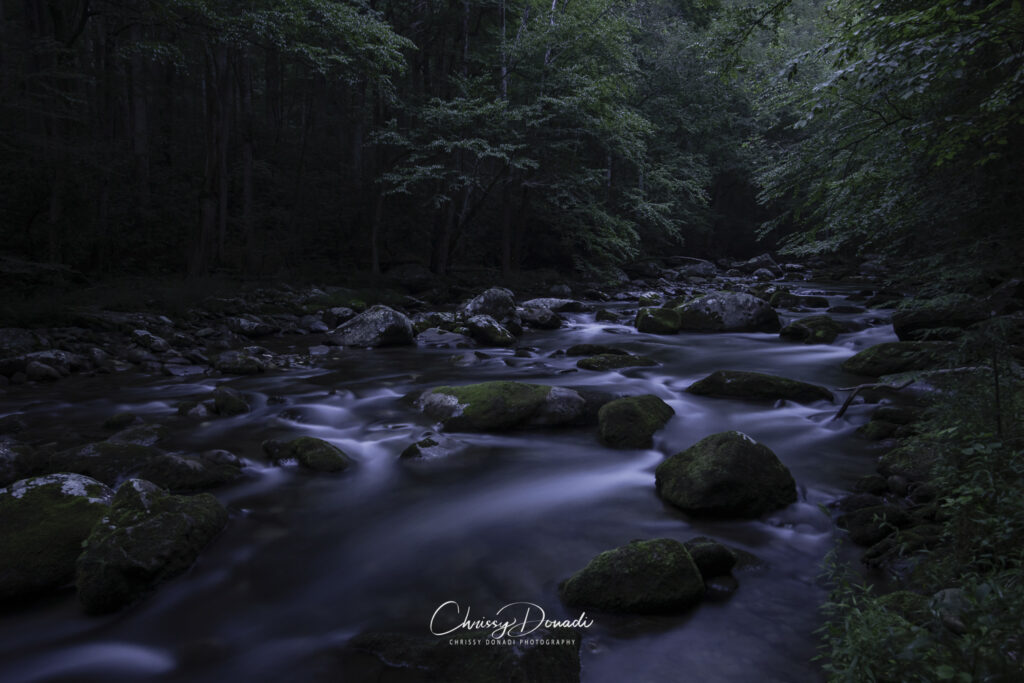
Before the firefly light show begins, create a foundational or base photo on a tripod during daylight (if clouded conditions) or early dusk. This photo should have enough light to ensure everything is in focus at a faster shutter speed and low ISO. I recommend not waiting until the blue hour for this shot. The forest can quickly become dark. That leaves a small window of time to capture the scene without wind or leaf movement.
To get as much of the scene in focus as possible, I used hyperfocal distance. The hyperfocal distance tells me the closest distance from the lens I can set my focal point to know anything beyond that spot will be in acceptably sharp focus. Additionally, I captured a few frames that were underexposed by about 1 stop. As long as you are shooting RAW, don’t worry too much about the colors. The temperature and tint can be addressed during post-processing. That’s where we’ll make it feel like it was taken in a dark and dim setting.

The next step is to wait for the light show. You’ll probably have a decent wait so get comfortable. Many people bring a camping chair to relax in the woodlands.
Camera Settings to Photograph Fireflies
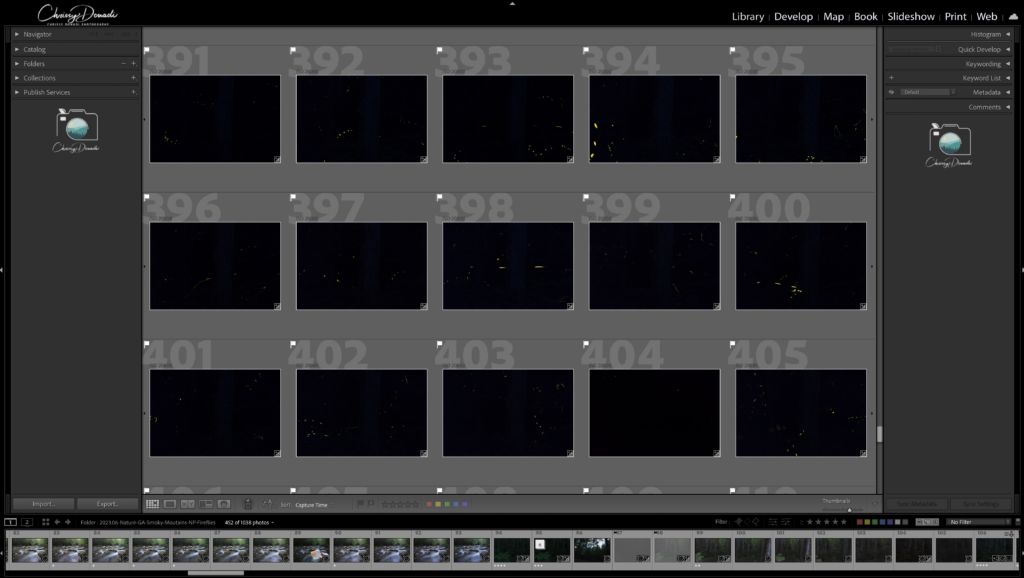
When it comes to photographing fireflies, I prefer capturing shorter timed frames, usually between 15 to 30 seconds, which can later be stacked in Photoshop. This technique is similar to photographing star trails and offers several advantages. It minimizes noise and provides greater creative control over the final result. Unlike attempting a single long exposure of several minutes, shorter frames ensure that if a firefly flies too close to your lens during one shot, it won’t ruin the entire exposure. Instead, you can remove that single yellow blob of an image from the focus stack and utilize all the other photos.
Now, without moving the tripod or camera lens, change your settings to photograph fireflies. Using manual mode, set the shutter speed somewhere between 15-30 seconds, as previously discussed. Adjust your aperture from the base photo setting (e.g., f/11) to around f/4 to allow more light. Any aperture between f/2.8 and f/5.6 should work well. Rely on hyperfocal distance again to reset your focus point based on the new aperture and mark the lens accordingly. Alternatively, just take a test shot and review on your LCD screen that most of the photo is in focus.
From this point onward, change the camera or lens to manual focus. We don’t want to trigger autofocus in the dark (remember the tape covering the front red-eye/focusing light?). To be extra safe, you can put a small piece of tape or a mark on the lens barrel to indicate the true infinity focus point. That way if you do happen to bump the lens at night, it’s easy to go under your dark cloth and reset the focus quickly.
Next, I changed my settings to auto-ISO with a designated range. The minimum was ISO 100 and the maximum was somewhere between 800 and 6400 depending on the scene. The aim is to balance sensitivity to the firefly light while minimizing noise. If you start photographing while there is still enough light, you can record the entire scene as the sequence goes from dim to pitch-black where only the firefly lights visible. This helps you understand how various elements, such as leaves and tree bark, appear in the dark and dim setting. These first images serve as reference points for your final image. Once the forest gets dark, the firefly frames themselves will be black, showcasing only their glowing trails.

To capture the fireflies in action, I set the interval timer on my Canon R5 to take 500 images at 1-second intervals. This way, the camera kept capturing the scene without my intervention. Even 100 frames, each photographed at 30 seconds exposure, results in nearly an hour of shooting. Occasionally, I would check the replay in the viewfinder under the dark cloth to ensure everything was recording correctly. However, the majority of the time, I savored the hypnotic and rhythmic dance of the lightning bugs swirling around me.
Post-Processing Tips for Firefly Photos
When it comes to post-processing, the first step is to process the base image of the forest to achieve the right colors and tones for a dark scene. Save any cropping for the end, once you’ve overlaid the firefly images onto the base photo. I prefer opening this in Photoshop as a Smart Layer. This makes it easier to readjust Adobe Camera RAW (ACR) sliders throughout the processing.
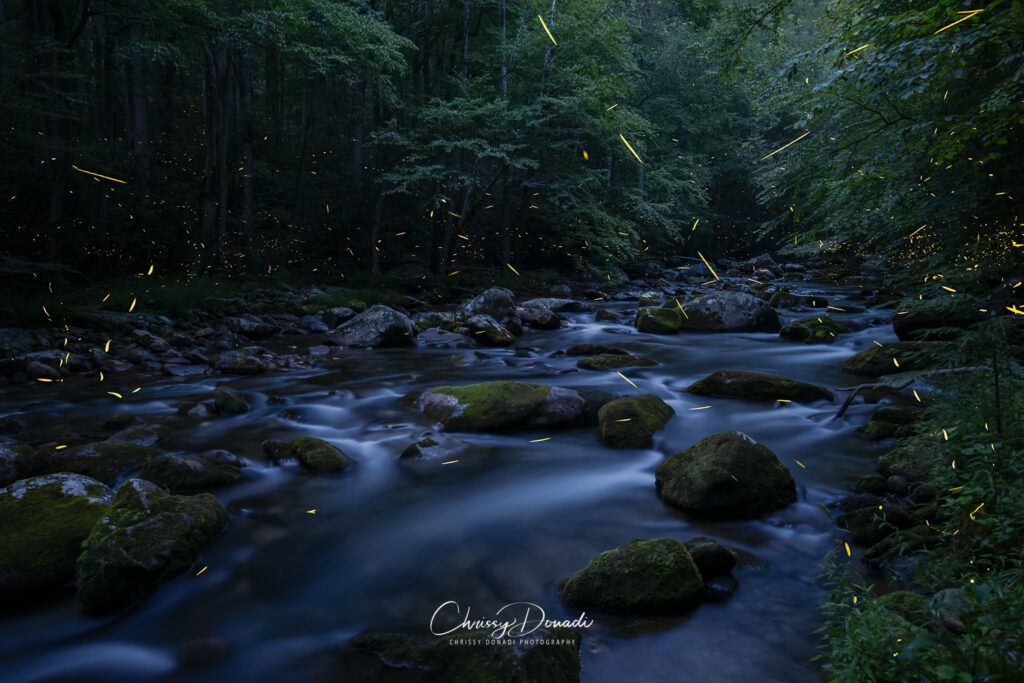
Next, select all your firefly images and open them in Photoshop as layers. Highlight all the firefly images except for the very bottom layer. Change the blend mode of those to Lighten. This technique works like magic, as all the lightning bug lights shine through onto that bottom layer. From here, experiment and play with the composition to tell the best story. Toggle the visibility of each layer in Photoshop. Decide which frames should stay and which should go, crafting the most captivating visual narrative.

Finally, merge the base image with the final firefly layer and make any last adjustments. Last, I sent my past self a thank your note for investing in that extra processing power when I bought my computer.
It’s been a wild ride to get to this point, but I love how much I get in touch with my inner kid with this project. Feeling that magic in the forest breathes life back into your soul. If you want to try to create a habitat on your property for fireflies, check out my quick read on how to create a firefly-friendly yard.
+ show Comments
- Hide Comments
add a comment